You create a video in Gemini, and the final result looks almost ready for use. The scene has good movement, and the visual style suits your idea. However, after downloading the file, you notice a visible Gemini or Veo watermark near the corner.
The mark may not cause a problem during a private test. It can feel distracting once you place the video inside a YouTube Short, Instagram Reel, presentation, or branded creative. A simple crop may remove part of the frame, while a random sticker can make the edit look obvious.
A proper Gemini video watermark removal process should remove the visible mark without affecting the main subject or changing the original frame too much. The correct method depends on the location of the watermark and the type of movement behind it.
This guide explains how you can remove a visible watermark from a Gemini video that you created or have permission to edit. It also explains the difference between the visible Gemini mark and Google’s invisible SynthID watermark.
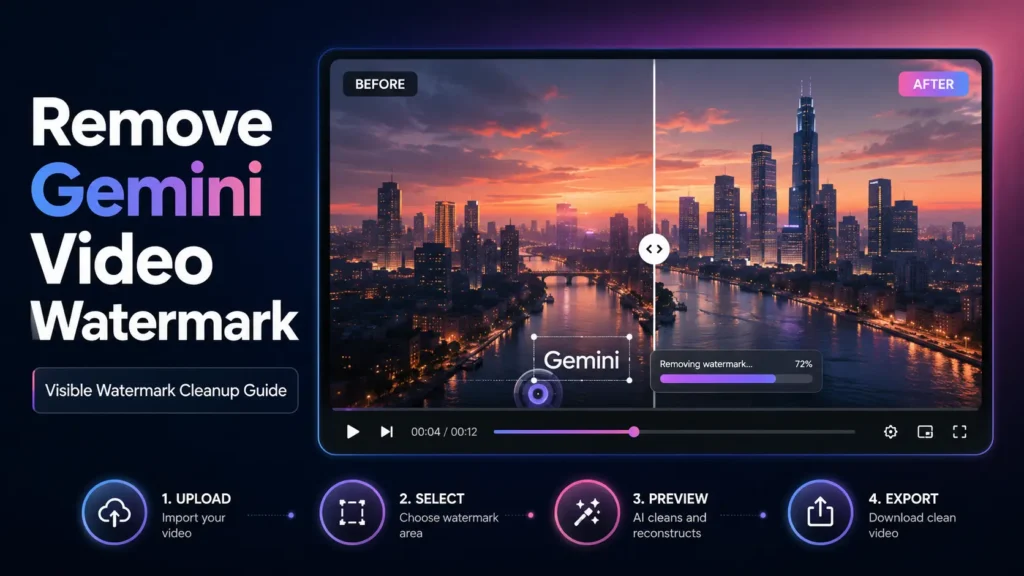
Why Gemini Videos Have a Visible Watermark
Gemini can create videos through Google’s AI video models. Depending on the tool, plan, region, and generation method, the exported video may contain a visible mark that shows the content was created with Google AI.
The mark usually appears close to an edge of the frame. It may stay in the same place for the full clip, but the content behind it can continue to move. This is what makes video watermark cleanup different from editing a still image.
In an image, the editor only needs to repair one frame. In a video, the selected area must look natural across every frame. The background, shadows, colours, and movement can change several times within a few seconds.
Google has also stated that its AI-generated videos include SynthID. This is an imperceptible digital watermark used to identify content created or edited with Google AI. Gemini can check uploaded videos for SynthID and may identify the portions where the watermark appears.
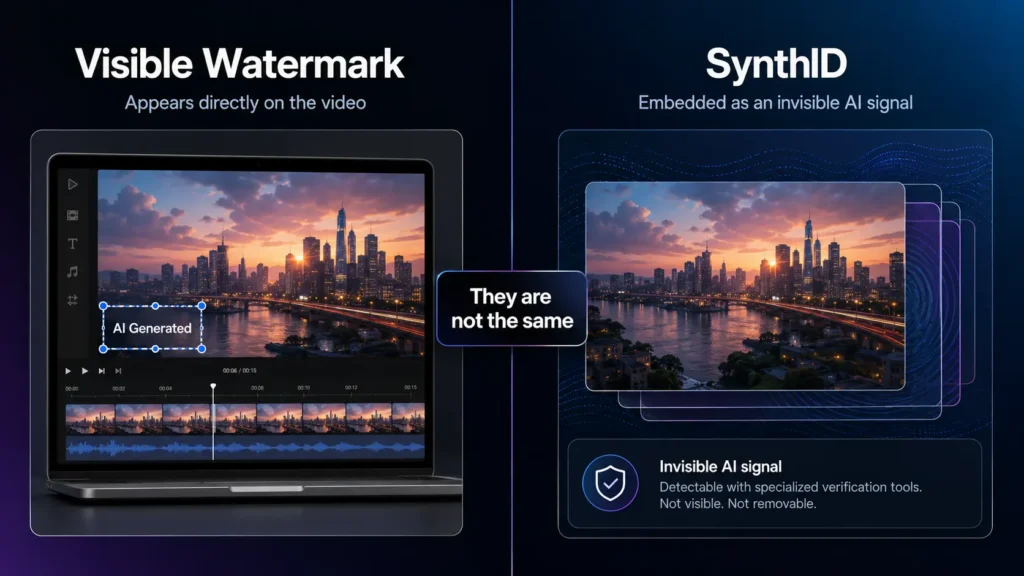
The visible mark and SynthID serve different purposes. Removing one does not mean the other has also been removed.
Visible Gemini Watermark and SynthID Are Different
A visible Gemini or Veo watermark appears directly on the video. You can see it while playing the file. A video cleanup tool may repair or replace the pixels around this visible area.
SynthID works differently. It is embedded into AI-generated content and is not displayed like a logo in the corner. Google describes it as a digital watermark that can help identify media generated or edited by its AI systems. Videos created with Veo are marked with SynthID.
| Watermark type | What appears on screen | Main purpose | Normal cleanup result |
|---|---|---|---|
| Visible Gemini or Veo mark | A logo or AI label is visible | Shows viewers that the video is AI-generated | The visible area may be repaired |
| SynthID | No normal logo appears | Helps verify Google AI-generated content | A visible watermark tool does not target it |
This guide covers the first type. It explains how to clean the visible mark from your own video. It does not explain how to remove SynthID or bypass AI-content verification.
You should also disclose that a video was created with AI where a platform, client, advertising policy, or local rule requires such disclosure. Removing a visible mark should not be used to present synthetic footage as a real recording.
Check the Video Before Removing the Watermark
Play the complete video once before uploading it to an editing tool. Do not judge the watermark from the opening frame alone.
The mark may remain in one corner, but the background behind it can change. It may first appear over a plain wall and later cover smoke, water, clothing, or another moving object. These changes affect the final cleanup result.
You should inspect four things before editing:
- Check the exact position and full size of the visible mark.
- Notice whether the background behind it remains simple or changes.
- Confirm the video resolution and frame shape.
- Keep an untouched copy of the original download.
The untouched file gives you a safe copy if the first edit produces blur or flicker. It also prevents you from processing a file that has already passed through several rounds of compression.
A watermark over an empty sky or plain surface is usually simple to repair. A mark over a person’s face, a moving hand, small text, or a detailed object may need extra work.
Method 1: Use an AI Video Watermark Removal Tool
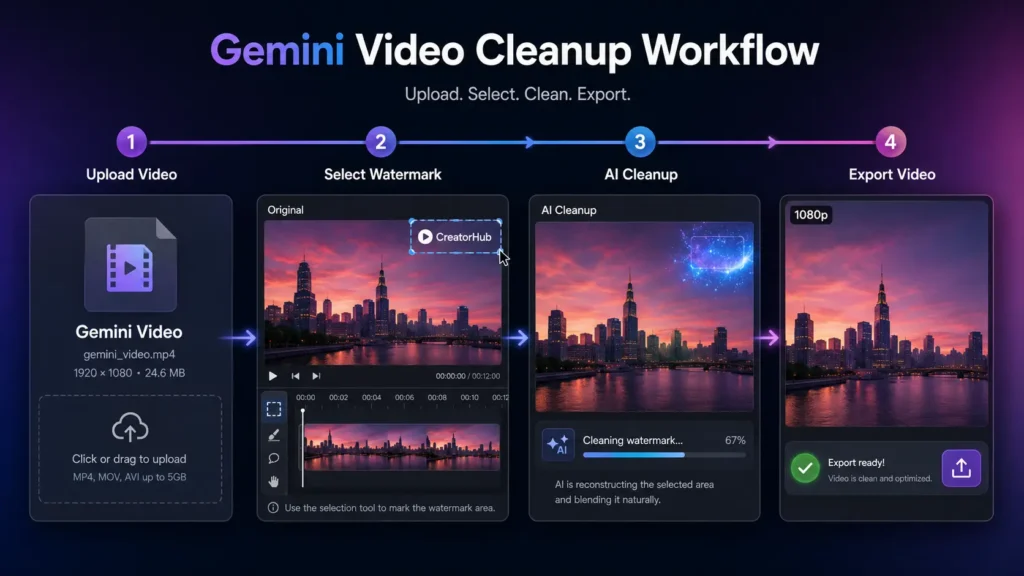
An AI video cleanup tool is usually the most practical option when the watermark remains in a fixed part of the frame. Instead of cutting the marked area from the video, the tool analyses the nearby content and rebuilds the selected section.
A good Gemini video watermark removal tool can be useful for this workflow because the video already comes from Gemini, and the visible mark usually follows a known placement pattern.
Start with the original file downloaded from Gemini. A copy saved from WhatsApp, Instagram, or another social platform may contain additional compression. That reduced detail can make the repaired area look soft.
Upload the video and wait for its preview to appear. Most tools will show the first frame or a short playback area where you can select the watermark.
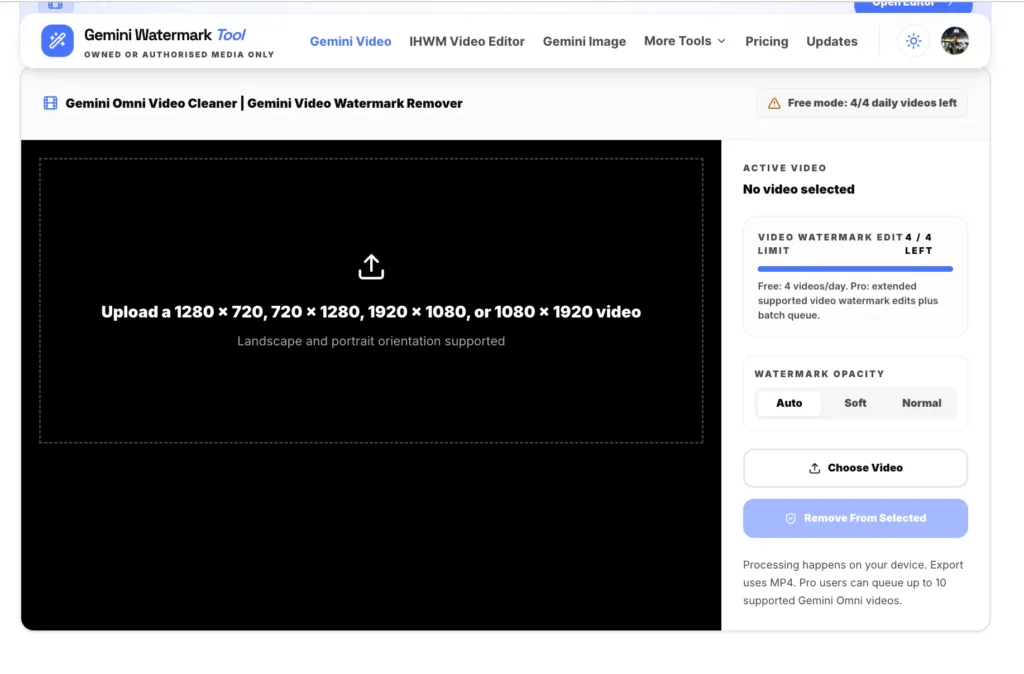
Use the selection brush or box to cover the full visible mark. The mask should include every visible edge of the logo, but it should not cover a large part of the background.
A small selection gives the tool a focused area to rebuild. A wide selection asks it to generate more missing detail across every frame. That can affect nearby textures or moving objects.
After selecting the area, start the cleanup process. The system will analyse nearby pixels and information from surrounding frames. It will try to fill the selected section while following changes in movement and lighting.
Once processing finishes, watch the complete preview. Do not check only a paused frame. Look closely at the repaired area during scene changes and fast movement.
The edited section should not show a flashing patch or a repeated texture. You should also check whether part of the original watermark remains around the border.
If a small part is still visible, adjust the selection and process the video again. Do not make the selection much larger unless the complete mark cannot be covered in another way.
Method 2: Crop the Watermark From the Frame
Cropping can work when the watermark sits very close to the outside edge, and the important part of the scene remains far from it.
Open the video in an editor and move the crop boundary beyond the watermark. The editor may scale the remaining part of the video to fill the original canvas.
This method removes the entire marked section instead of repairing it. It is fast, but it changes the original composition.
A crop may remove space above a person’s head or cut part of a product. It may also affect text placed near the bottom of the video. Scaling the remaining frame can make low-resolution details more visible.
Cropping may suit the video in these situations:
- The watermark is placed close to an empty edge.
- The subject remains near the centre of the frame.
- The final platform needs another aspect ratio.
- The crop does not remove text or important visual detail.
For example, a horizontal Gemini video may need a vertical edit for Instagram Reels. You may already need to crop the sides during this conversion. In such a case, the watermark can sometimes be removed as part of the same edit.
Cropping should not be forced where it harms the scene. Saving a small corner is not useful if the final frame loses the main subject.
Method 3: Cover the Mark as Part of the Video Design
A visible watermark can sometimes be covered with an element that already serves a useful purpose in the video.
You may add a caption background near the bottom or place the clip inside a branded frame. A channel label or title strip can also occupy the marked area.
The added element should look like part of the complete layout. A random shape placed over one corner may draw more attention than the original watermark.
This method does not repair the video behind the mark. It only places another layer above it.
A creative overlay can work for:
- Social media clips that already use branded layouts.
- Product videos that need a caption bar.
- Tutorials with labels or short instructions.
- Videos are shown inside a designed presentation frame.
Avoid placing a large logo over a face or moving subject. The cover should support the content and not block another important detail.
Method 4: Manually Repair Difficult Frames
Automatic cleanup may have problems if the watermark overlaps a moving subject or a detailed background. The tool can create a smooth patch in one frame and a visible texture change in the next.
Manual editing gives you more control in these situations. A video editor can use masks, motion tracking, cloning, or information from nearby frames to repair the area.
For example, suppose the watermark appears over a moving road. The texture and direction of the road change as the camera moves. A fixed replacement patch may look unnatural because it does not follow the motion.
A tracked repair can move with the scene and adjust the replacement area across the clip. This takes more effort, but it may produce a suitable result for videos with complex movement.
Manual editing is also useful when a person or object moves behind the watermark. You may need different masks for different parts of the clip instead of one mask for the complete video.
How to Edit Watermarks From Video Files Naturally
People who need to edit watermarks from video files should first inspect the position of the mark and the movement behind it. The source of the video also affects which tool will suit the task.
A Gemini-focused tool is suitable when you are working mainly with Gemini or Veo videos. A general video cleanup platform is useful when the file comes from another source or contains a different type of visible mark.
The basic process remains similar. You upload the original file and select the marked area. The tool analyses the surrounding content and generates a cleaned version.
However, results can vary based on the video. A fixed logo over a plain background gives the system more predictable information. A mark placed over reflections, changing lights, hair, or moving text creates a complex repair.
This is why no single method should be used blindly for every clip. The best method is the one that protects the scene while removing the visible distraction.
How to Protect Video Quality During Cleanup
Watermark removal does not need to reduce the quality of the full video. Quality loss usually comes from the source file, export settings, or repeated compression.
Always use the original Gemini download where possible. A file downloaded again from a social media platform may already have reduced detail and a different bitrate.
Keep the original resolution during export. If the source video is 1080p, exporting it at 1080p helps preserve the existing detail. Increasing it to a much larger resolution will not recreate information that was not present in the original file.
The repair selection should remain close to the watermark. A very large selection may affect nearby objects because the tool needs to reconstruct a wider area.
You should also avoid processing and exporting the same video several times. Each export can introduce another compression cycle. Finish the visible cleanup first and complete captions, resizing, or other edits in one final editor where possible.
Pay attention to the frame rate as well. Changing it without a reason can affect motion and create duplicated or missing frames. Retain the source frame rate unless the final platform requires another setting.
Common Problems After Removing a Gemini Watermark
The repaired area may look acceptable in a still frame, but show problems during playback. A complete review helps you find these issues before publishing.
A Blurry Patch Appears
Blur can appear when the selected area is too wide or the background contains limited usable detail. Reduce the selection and try another pass.
You may also need manual repair if the mark covers a detailed object. The tool cannot always recreate information that remains hidden during the complete clip.
The Background Flickers
Flicker appears when the reconstructed texture changes between frames. It is often visible around water, smoke, reflections, moving lights, or detailed surfaces.
Watch the repaired area at normal speed and in slow playback. A tracked manual edit may work well if the automatic result changes too much between frames.
Part of the Watermark Remains
This usually means the selection did not cover the full border of the mark. Increase the mask slightly and process the clip again.
Do not make the mask much wider than needed. A small extension around the logo is often enough.
The Exported Video Looks Compressed
Check whether the tool changed the resolution or used a low-quality export setting. Compare the processed file with the original on the same screen.
Repeated uploads through messaging and social apps can also affect the video. Transfer the original file directly whenever possible.
Which Watermark Removal Method Should You Choose?
The correct choice depends on what appears behind the watermark and how you plan to use the video.
| Video situation | Suitable method | What to check |
|---|---|---|
| Fixed watermark over a simple background | AI video cleanup | Review the repaired area across the full clip |
| Watermark close to an empty frame edge | Crop | Confirm that the subject remains complete |
| Video already needs titles or branding | Creative overlay | Make the cover look intentional |
| Watermark over movement or fine detail | Manual repair | Inspect tracking and frame consistency |
An AI cleanup tool is usually the first method worth testing. It lets you retain the complete frame and does not require advanced editing knowledge.
Cropping can be useful if the lost edge contains no important detail. Manual repair should be kept for videos where the watermark crosses movement or complex textures.
Where You Can Use the Cleaned Gemini Video
A cleaned video may fit several personal and commercial workflows, provided you have the required rights and follow the rules of the publishing platform.
You may use it in a YouTube video or an Instagram Reel. It may also appear in a presentation or a product demonstration. Content creators can place it inside a designed social post, while businesses may use their own AI-generated clip in a campaign draft.
Removing the visible watermark does not automatically give you rights over prompts, uploaded source images, music, faces, or other material used in the video. Check every source file before publishing the result.
You should also label AI-generated content where required. Some platforms apply their own disclosure rules, especially for realistic synthetic media or advertising.
Responsible Use of Gemini Video Watermark Removal
Only edit a watermark from a video that you created or have permission to modify. Access to a downloadable file does not mean you own the content.
Do not remove identifying marks from another creator’s video and publish it as your own. The same rule applies to agency work, client files, stock footage, and social media downloads.
The purpose of visible cleanup should be to prepare your own media for a suitable layout or publishing workflow. It should not be used to mislead people about where a video came from.
Google uses SynthID to support AI-content transparency. Videos generated through Veo contain this imperceptible watermark, and Gemini can scan uploaded media to check for it.
A normal video cleanup tool works on the visible area of the frame. It should not be described as a tool for defeating invisible identification systems.
Final Checks Before Publishing
Play the entire exported video on at least two screen sizes. A repaired area that looks fine on a laptop may appear soft or unstable on a phone.
Check the following points before you publish:
- Watch the marked area during movement and scene changes.
- Confirm that the output has the expected resolution and sound.
- Make sure no part of the visible mark remains.
- Add an AI disclosure where the publishing context requires it.
You should also compare the edited file with the original. Look at the subject position, frame size, colour, and motion. The watermark may be gone, but the edit should not create another visual problem.
Final Thoughts
Removing a visible Gemini watermark is mainly a video repair task. The tool needs to rebuild the marked area across multiple frames while keeping the surrounding movement natural.
A dedicated Gemini video tool can work well for a fixed mark over a simple background. Cropping or a creative overlay may suit clips where the composition allows it. Manual repair is useful where the watermark overlaps movement or fine detail.
The visible Gemini or Veo mark is also different from SynthID. Cleaning the logo from the corner does not mean the AI origin of the video has been removed. Use the cleaned file responsibly and follow the disclosure requirements that apply to your platform or project.
Frequently Asked Questions
Can I remove the watermark from a Gemini-generated video?
You can clean a visible watermark from a video you created or have permission to edit. You should still follow Gemini’s terms and the publishing platform’s AI-content rules.
Does removing the visible Gemini watermark remove SynthID?
No. The visible mark and SynthID are different. SynthID is an imperceptible digital watermark used to identify content created or edited with Google AI.
Will watermark removal reduce the video quality?
The result depends on the original file, background, movement, selection size, and export settings. Using the original download and retaining its resolution can help protect the output.
Why does the repaired area look blurry?
The tool may not have enough visible information to rebuild the hidden area. This can happen where the watermark covers movement, detailed textures, text, or an important object.


